Why estimates matter more than your price
Your estimate is the single piece of paper a potential client uses to decide whether to trust you with their project. It is not a price list. It is a proposal of understanding. When a homeowner reads your estimate, they are really asking: do you understand what I need, and can I trust you to deliver it at this price?
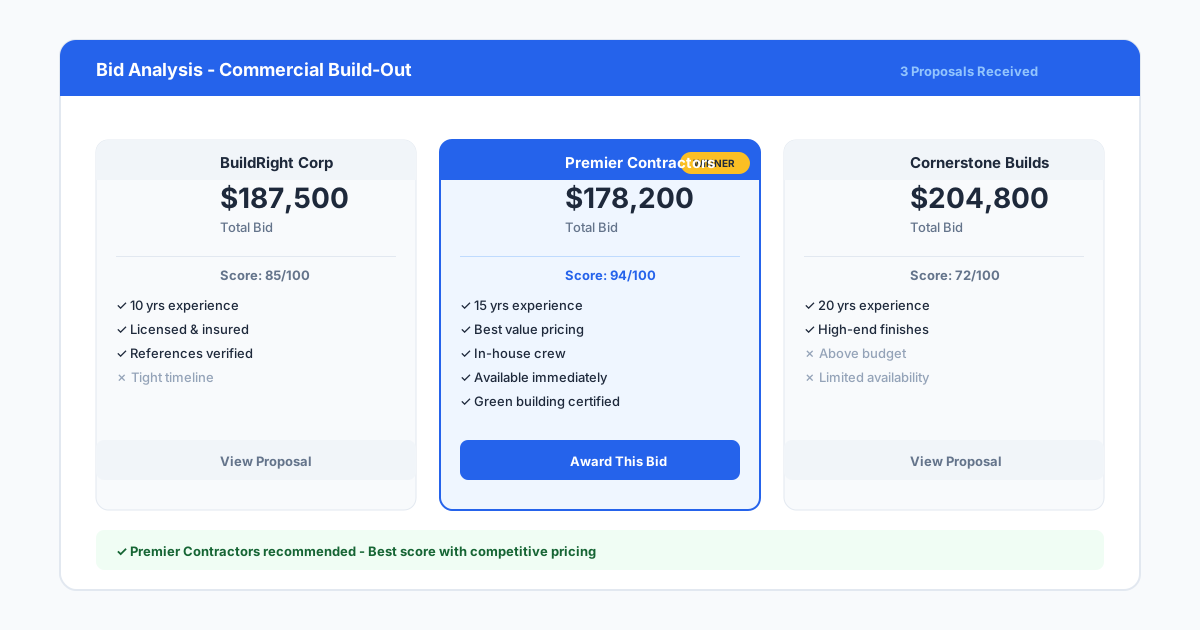
A sloppy estimate suggests sloppy work. An estimate with vague line items, missing scope, or math that does not add up tells the client you will manage their project the same way. The difference between winning and losing a job often comes down to which contractor made the client feel most confident, not which one came in lowest.
That is why the process matters as much as the number. A well-built estimate that accounts for materials, labor, overhead, and profit — and explains each in plain language — gives the client a reason to say yes beyond price. It also protects you when scope questions come up later, because every line item documents what was included and what was not.
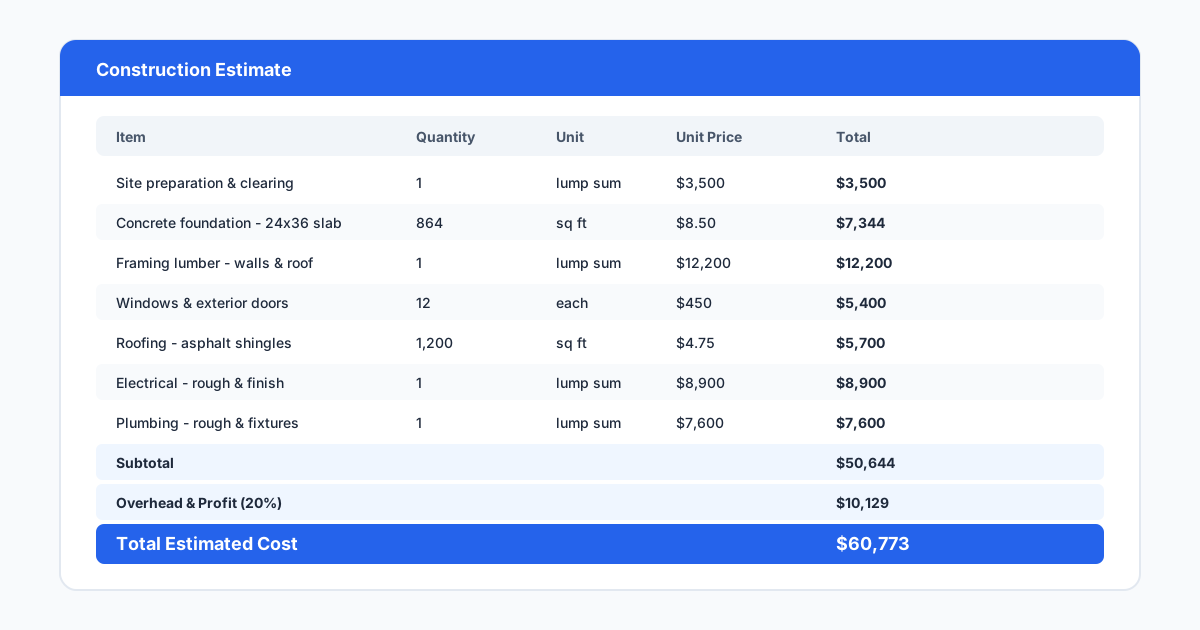
A detailed estimate builds client confidence and protects your profit margins.
Step 1: Gather your scope before you price anything
The most common estimating mistake is pricing a job before the scope is fully defined. A client says they want a deck, you picture a standard 12x16, and you quote based on that assumption. Then they mention the stairs, the built-in benches, the trex versus pressure-treated, and suddenly your price is wrong before you even start.
Scope gathering starts with a site visit. Walk the property, take measurements, and note every condition that affects cost: access constraints, demolition requirements, existing materials to match, permit needs, and anything unusual about the site. Take photos and reference measurements. If you cannot visit in person, request detailed photos and have a video call where the client walks the area.
Review the project drawings or sketches. If no drawing exists, create one or ask the client for a sketch of what they want. A dimensioned drawing eliminates more estimating errors than any spreadsheet ever will. Reference existing plans, HOA guidelines, and any engineering requirements before you start pricing.
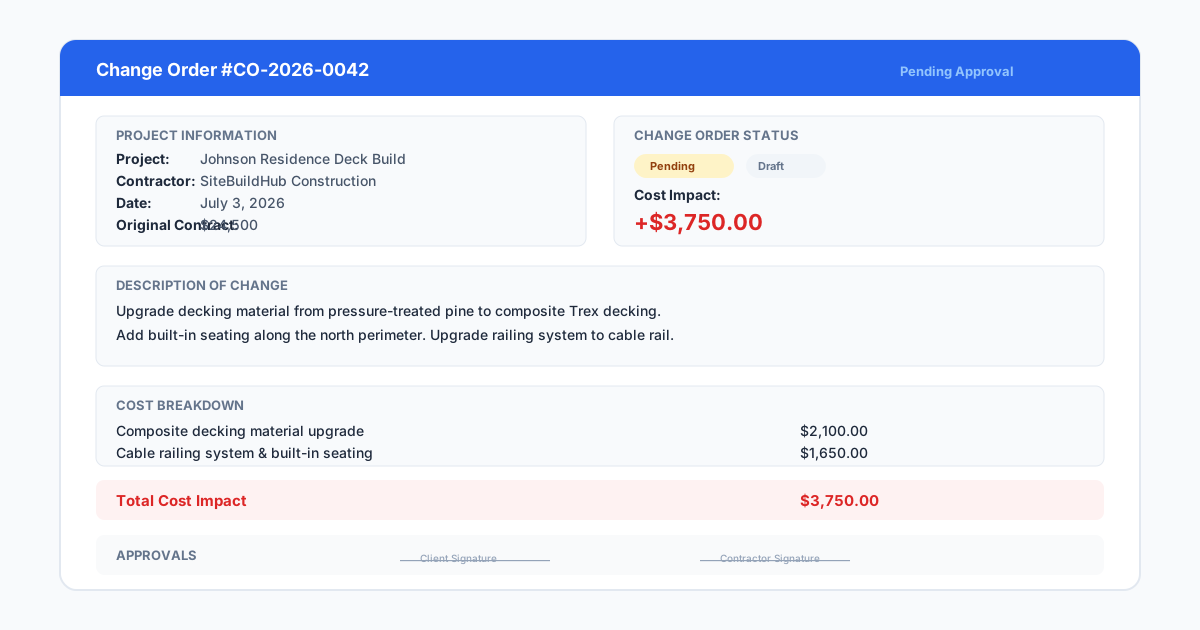
Document your scope assumptions in writing. If your price assumes the client handles demolition or permits, say so. If the price excludes electrical work or foundation repairs, say that too. A scope document signed by both parties before the estimate goes out prevents the most painful kind of change order: the one that starts with 'I thought that was included.'
- Visit the site and measure everything that affects cost
- Review or create project drawings before estimating
- Document every scope assumption in writing
- Note exclusions clearly — what is NOT included matters as much as what is
- Get client sign-off on scope before finalizing the price
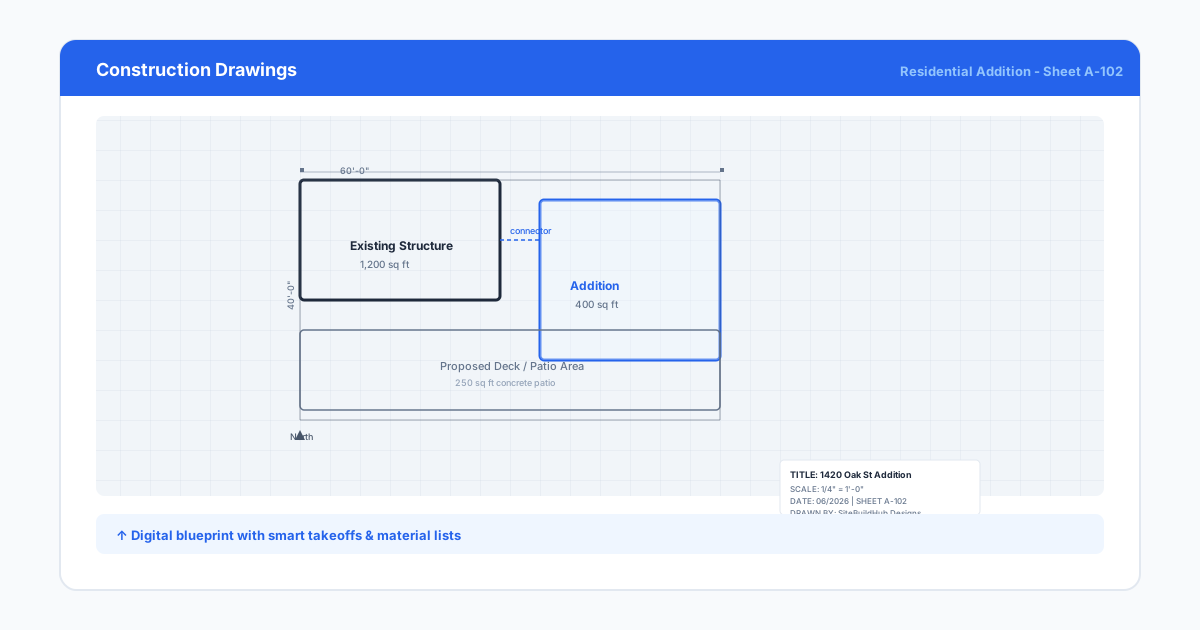
Site drawings and measurements should be locked before you write a single line item.
Step 2: Quantify materials with precision
Material quantity errors are the easiest to make and the hardest to recover from. If you undercount siding by 10 percent, you either eat the difference or go back to the client for more money — neither option is good. If you overcount by 15 percent, your price looks too high and you lose the bid.
Start with a material takeoff from your measurements or drawings. For a deck, that means counting linear feet of joists and beams, square footage of decking, number of posts and post bases, railing linear feet, hardware counts, and fasteners. Do not guess. A 12x16 deck with 16-inch joist spacing takes roughly 13 joists at 12 feet, not 10.
Use industry-standard waste factors for each material. Lumber typically needs 10 to 15 percent waste allowance. Tile and flooring need 10 to 20 percent depending on pattern complexity. Concrete needs 5 to 10 percent for spillage and grade variations. Apply these percentages after your net quantity, not before.
Get current material prices from your suppliers, not from last year's project. Lumber, steel, and concrete prices fluctuate seasonally and regionally. A price that was accurate three months ago may be off by 20 percent today. Call your supplier, check recent invoices for similar jobs, or use an estimating platform with updated pricing data.
Create line items that match how you will buy the materials. If lumber comes in 16-foot lengths, do not price it by the linear foot and assume waste. Price it by the board at actual lengths. Your purchase order should mirror your estimate so you can track variances when the job starts.
- Complete a full material takeoff from measurements or drawings
- Apply realistic waste factors (10-15% for lumber, 5-10% for concrete)
- Verify current pricing with suppliers, not old invoices
- Structure line items to match actual purchasing units
- Document material specs — brand, grade, finish — in every line item
Step 3: Price labor accurately
Labor is the line item where most contractors lose money. Material costs are relatively predictable, but labor depends on crew efficiency, job conditions, weather, and a dozen other variables. Underpricing labor by even a few hours on a five-day job can wipe out your profit margin entirely.
Calculate labor by breaking the job into tasks and estimating hours per task. For a fence installation, you might estimate: post-hole digging (2 hours per hole in normal soil), panel assembly (30 minutes per section), panel installation (20 minutes per section), and gate installation (1 hour per gate). Add your hours, multiply by your crew's effective hourly rate, and you have your labor cost.
Your crew's effective hourly rate is not what you pay them. It includes wages, payroll taxes, workers' compensation insurance, paid time off, tool allowances, and any other labor-related costs. A carpenter you pay $28 per hour likely costs you $38 to $42 per hour after burden. We will cover labor burden calculations in detail in the next article, but the important rule is: do not use hourly wage as your labor cost.
Add contingency for conditions you cannot predict. Hard soil, rain delays, material delivery delays, and unexpected site conditions all add labor hours. A 10 to 15 percent labor contingency protects you from the jobs where everything goes slightly wrong — and those jobs are more common than the ones where everything goes perfectly.
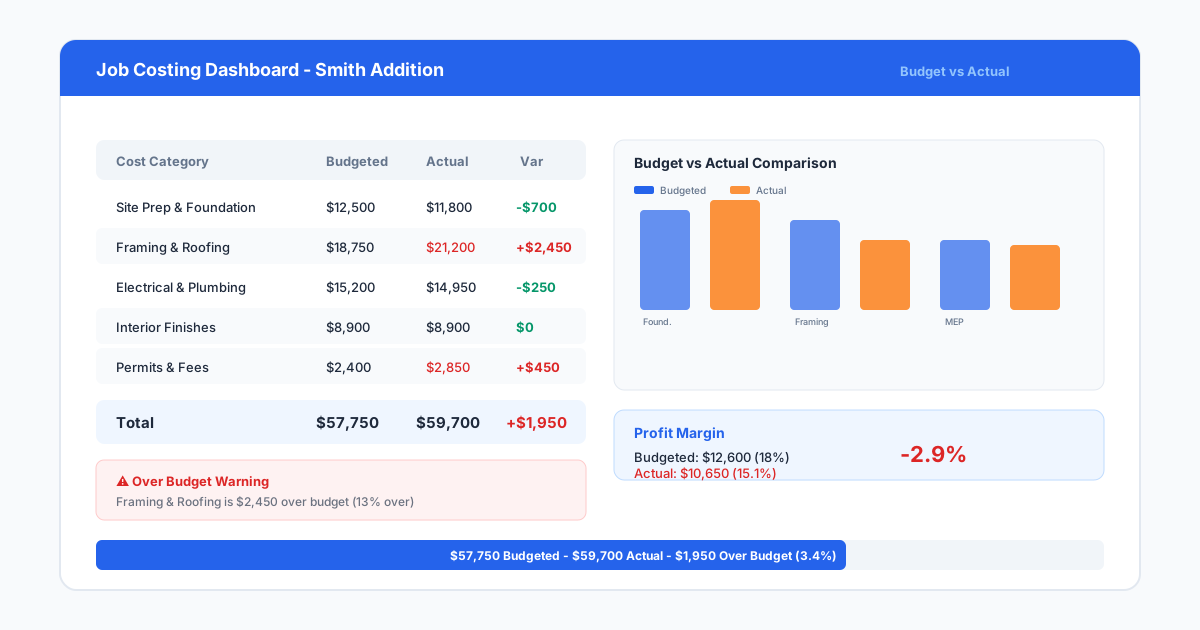
Labor is your biggest variable cost. Estimate hours task by task, not by gut feel.
Step 4: Add overhead and profit correctly
Overhead is the cost of keeping your doors open, and profit is what you earn for taking the risk. Many contractors confuse the two or skip overhead entirely because they think including it makes their price uncompetitive. The math does not work that way. If you do not include overhead, you are subsidizing every job with your own savings, and that is not sustainable.
Calculate your overhead rate by dividing your total annual overhead costs by your total annual labor revenue. Overhead includes office rent, utilities, insurance, vehicle costs, office salaries, marketing, software subscriptions, legal and accounting fees, and equipment depreciation. For most small contractors, overhead runs between 25 and 40 percent of direct labor costs.
Apply overhead as a percentage of your total direct costs (materials plus labor), or as a markup on labor only, depending on your accounting method. The important thing is consistency. Pick a method, calculate your rate, and apply it to every estimate so you can track whether your overhead assumptions are accurate over time.
Profit margin is separate from overhead. For most residential construction, a net profit margin of 10 to 20 percent is healthy. Some contractors add profit as a percentage of total costs after overhead. Others build it into their labor rates. Either method works as long as you know your number and track it. If you finish a year with 3 percent net profit, your pricing is too low or your overhead is too high.
- Calculate overhead as a percentage of direct costs or labor
- Include all indirect costs: rent, insurance, vehicles, software, marketing
- Apply overhead consistently to every estimate
- Target 10-20% net profit margin after all costs and overhead
- Track actual overhead quarterly and adjust your rate if needed
Step 5: Review and present the estimate
Before sending the estimate, review every line item for accuracy. Check your math. Verify material quantities against your takeoff. Confirm labor hours against similar past projects. Review your markup percentages. A simple math error on a $50,000 estimate can cost you thousands or lose you the job if it makes your price look unreasonable.
Format the estimate so the client can actually read it. Group line items by category: site work, foundation, framing, roofing, finishes. Use plain language for descriptions, not industry shorthand. If you use codes or abbreviations, include a legend. The goal is an estimate that makes sense to someone who has never built anything.
Include a clear scope summary at the top that states what the project includes and what it excludes. This is the most valuable paragraph in your entire estimate. When a client compares your bid against a competitor's, they are comparing scope assumptions as much as prices. A clear scope summary makes your bid easier to evaluate and harder to discount.
Present the estimate in person or on a video call when possible. Walk the client through each section, explain what drives the cost, and answer questions. Clients who understand what they are paying for are less likely to shop your price against a competitor who omitted half the scope. A 20-minute walkthrough can be the difference between winning the job at your price and losing it to a lower number that does not include everything you quoted.
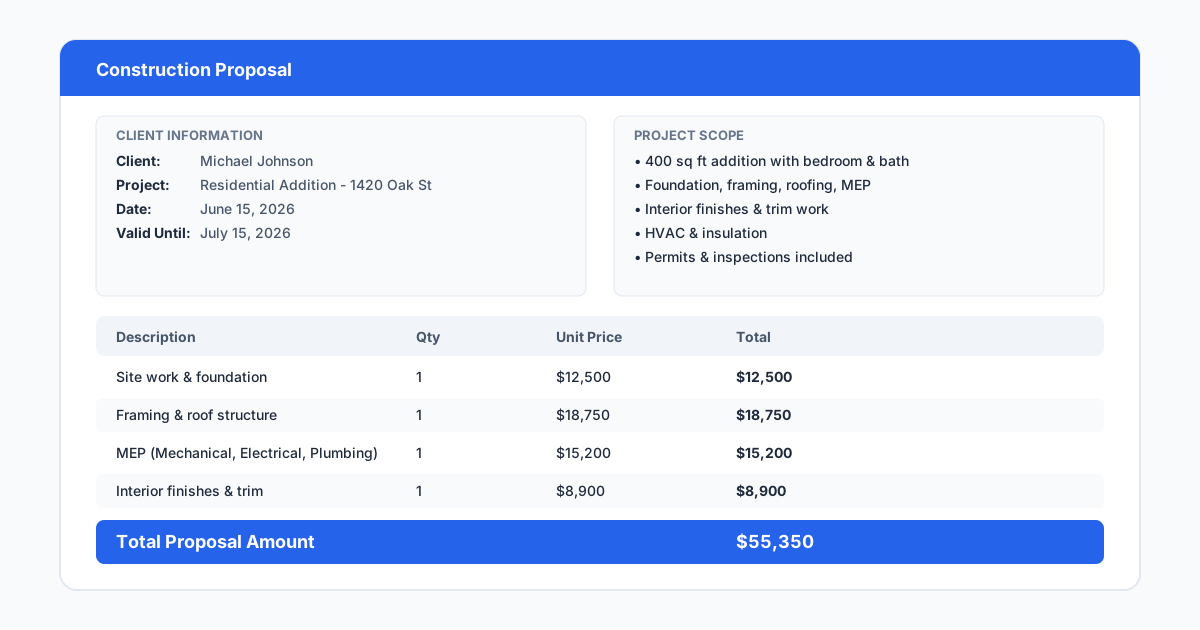
A well-formatted estimate with clear scope helps clients understand what they are buying.
Common estimating pitfalls to avoid
The first pitfall is pricing without a complete scope. Every assumption you make without verifying it is a risk. The client says 'standard finish,' but you do not know what standard means to them. The drawing shows one window, but the client mentioned adding another. Verify everything before you price it, or include a clear allowance with a note that final pricing depends on confirmed selections.
The second pitfall is using old pricing data. Material prices change, especially for volatile commodities like lumber, steel, and copper. A three-month-old price is not reliable. Get fresh quotes from suppliers for every estimate over a few thousand dollars. The time you save by reusing old numbers is not worth the margin you lose when prices have increased.
The third pitfall is ignoring soft costs. Permits, engineering fees, dumpster rentals, porta-potties, temporary utilities, insurance riders, and cleanup all cost money. If these are not in your estimate, they are coming out of your profit. Small soft costs add up fast — a $400 permit here and a $600 dumpster there can easily total $3,000 to $5,000 on a medium-sized project.
The fourth pitfall is failing to document changes. If the client adds scope during the estimating process — 'oh, and can you also replace the patio door?' — update the estimate and the scope document. Do not absorb small additions to keep the price competitive. Those small additions become big profit leaks when they happen on every job.
- Never price from an incomplete or unverified scope
- Get fresh supplier quotes for every significant job
- Include all soft costs: permits, fees, dumpsters, cleanup
- Document every scope change during the estimating process
- Review your estimates against actual job costs to improve accuracy over time